In Fire Emblem Engage, there are only so many Emblem Rings to go around, meaning several of your Units will likely miss out on the power bonuses.
Luckily, Bond Rings are a solid alternative option, providing similar power boosts and Skills for your Units, just on a less powerful scale. While obtaining Bond Rings has a strong element of luck due to the gacha-like system involving your Bond Fragments, there are a certain few Bond Rings that are much more valuable for boosting the power of your Units.
Recommended Read: Best Class for Each Character in Fire Emblem Engage
In Fire Emblem Engage, each Emblem you obtain will have 40 different Bond Rings that can be crafted and collected, with each Bond Ring offering unique boosts and perks. These Rings are divided by character and rank, with S-Rank Bond Rings being the rarest to obtain and the most powerful when equipped to your Units.
However, with so many Bond Rings in the game, it can be a tricky task to identify which Rings are the best of the bunch.
Follow along below for a complete breakdown of the best S-Ranked Bond Rings in Fire Emblem Engage, as well as the unique boosts or perks that they can offer to equipped Units.
Table of Contents
How to Get S-Ranked Bond Rings in Fire Emblem Engage
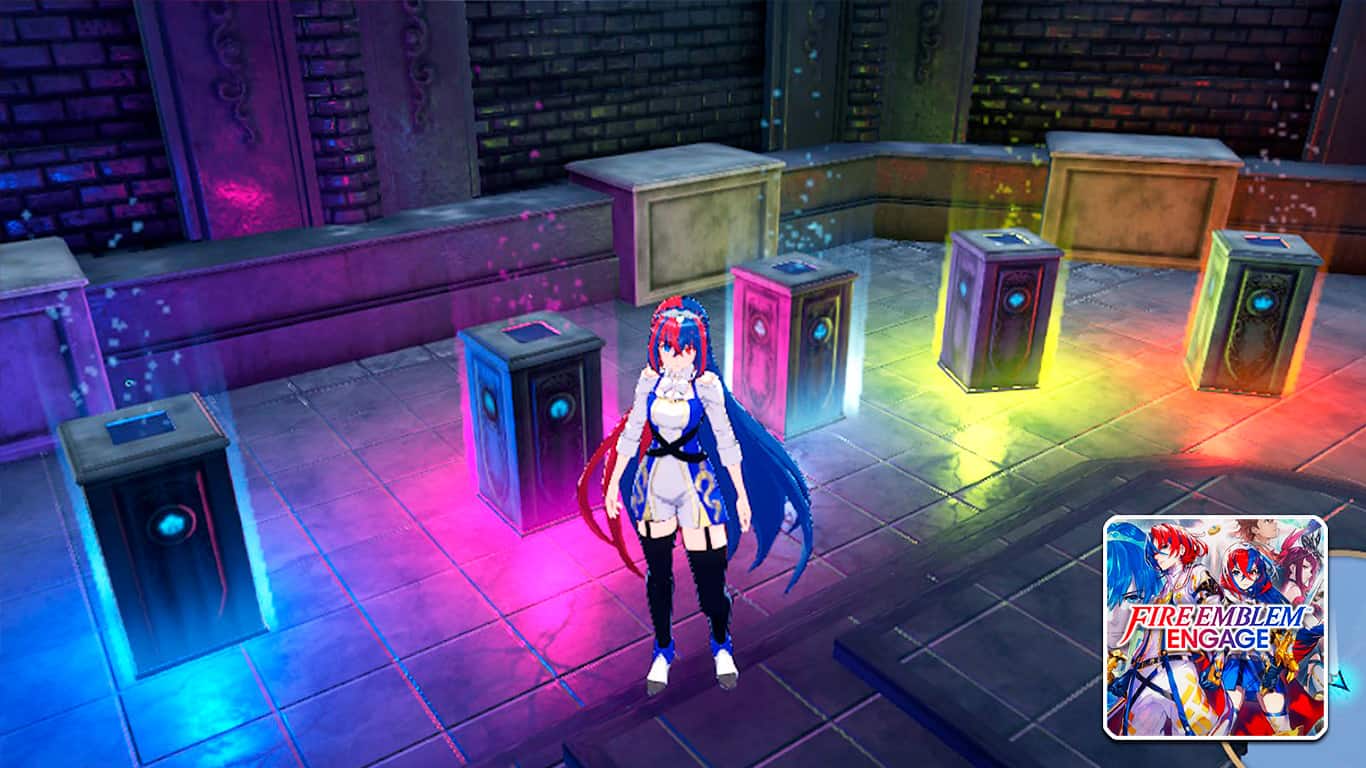
In Fire Emblem Engage, you can obtain Bond Rings by creating them from Bond Fragments in Somniel’s Ring Chamber.
However, creating Bond Rings is a luck-based experience, similar to the popular gacha mechanic found in numerous other games.
When creating Bond Rings, you will have the option to spend 100 Bond Fragments to create one ring or 1000 Bond Fragments to create a batch of ten.
Each Bond Ring you receive is randomly generated from the forty different options available, depending on which Emblem you selected.
This means that obtaining S-Ranked Bond Rings is left completely up to luck but can be done with ease if you’ve stocked up a large stash of Bond Fragments to spend.
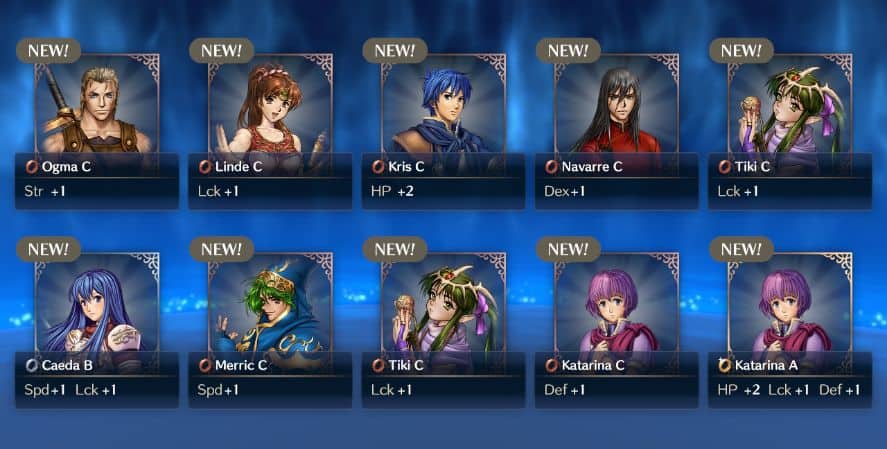
However, as you obtain more Bond Rings, you’re likely to receive some doubles due to the randomized results.
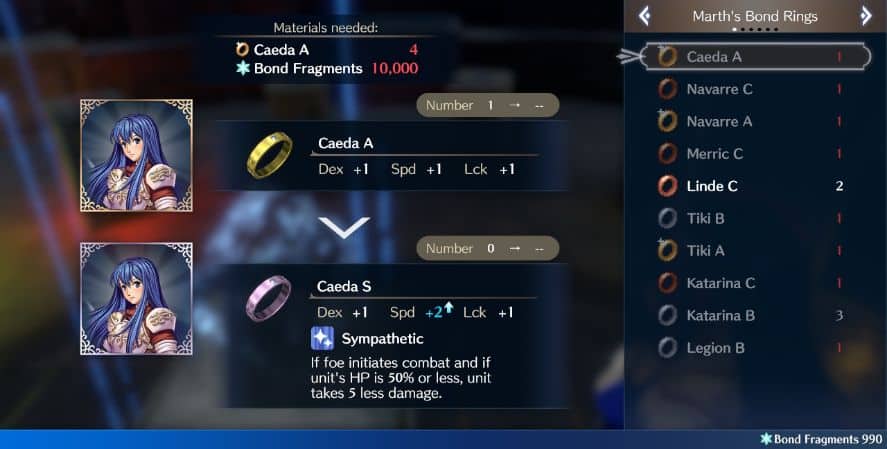
If you have several copies of a single Bond Ring, you can combine and fuse them into the next highest Rank through the Meld Bond Rings option in Somniel’s Ring Chamber.
This, for example, would let you take your 4x Mereeta A Rings and combine them into a Mareeta S Ring. Melding A-Rank Bond Rings to an S-Rank will cost 10,000 Bond Fragments per ring.
This is a solid option to consider if you’re desperately seeking one ring in particular, but it is much more expensive at the equivalent of 100 randomly rolled Bond Rings (10x batches of 10 at 1000 Bond Fragments).
For this reason, you will need to determine which option best suits you depending on which point you are at during your playthrough and how many Bond Fragments you’re willing to spend.
Best S-Ranked Bond Rings in Fire Emblem Engage
Only certain S-Ranked Bond Rings provide both stat boosts and unique Skill when equipped to a Unit, which can be a valuable combination.
Each section will have a breakdown of the stat increases and Skill effects that can enhance the equipped Unit’s build, so follow along below for everything you’ll need to make your decision about which Bond Rings you’re going to seek out for your own playthrough.
Keeping this in mind, here are the twelve best Bond Rings in Fire Emblem Engage, based on the most efficient stat + Skill combinations.
Caeda (Emblem Marth)
| Bond Ring | Stats Provided | Skill Granted |
| Caeda S | Dexterity +1, Speed +2, Luck +1 | Sympathetic: If foe initiates combat and if unit’s HP is 50% or less, unit takes 5 less damage. |
Caeda’s S-Rank Ring brings valuable boosts to Dex, Speed, and Luck stats, as well as offering the perk of taking 5 less damage when the equipped Unit is under 50% of their health and takes a hit from the enemy.
This can be a very useful ring to attach to either a heavy frontline Unit that is often surrounded by multiple enemies or even a more squishy Support Unit to give them that extra survivability.
Navarre (Emblem Marth)
| Bond Ring | Stats Provided | Skill Granted |
| Navarre S | Dexterity +2, Speed +1, Luck +1 | Deadly Blade: If unit initiates combat with a sword, grants Crit+10 during combat. |
Navarre’s S-Rank Bond Ring is the perfect addition to any Sword-wielding unit, as the Deadly Blade Skill grants a +10 bonus to the equipped Unit’s critical hit rate whenever they initiate combat with a Sword Weapon.
Deirdre (Emblem Sigurd)
| Bond Ring | Stats Provided | Skill Granted |
| Deidre S | Magic +1, Dexterity +1, Resistance +2 | Renewal: Unit recovers 5 HP each turn. |
Deidre’s S-Rank Bond Ring provides some helpful bonuses to Magic, Dexterity, and Resistance, which are valuable increases to any Magic user.
However, the real value of this ring comes in the Renewal Skill, which allows the equipped Unit to recover a steady 5 HP each turn of combat.
This grants an extra layer of survivability and helps keep your squishy Magic users alive, especially healers, who often have to decide between healing an ally in need or recovering HP for themselves.
Mae (Emblem Celica)
| Bond Ring | Stats Provided | Skill Granted |
| Mae S | Magic +2, Speed +1, Resistance +1 | Great Thunder: If unit uses Thunder, Elthunder, or Thoron, deals +20% damage. |
Mae’s S-Rank Ring offers huge bonuses to any Magic user equipped with a Thunder Magic Tome, granting an additional 20% damage to any hit on the enemy from these weapons.
This can enhance the power of your Magic users significantly and enable them to do very solid chunks of damage.
The additional stat increases in Magic, Speed, and Resistance also go nicely to enhance the Great Thunder ability and increase the power of your Magic-wielding Units.
Olwen (Emblem Leif)
| Bond Ring | Stats Provided | Skill Granted |
| Olwen S | Magic +1, Speed +2, Luck +1 | Dire Thunder: When unit initiates combat with Thunder equipped, unit attacks twice. (Excludes Elthunder and Thoron.) |
Operating quite similarly to Mae’s ring, Olwen’s S-Rank Bond Ring grants your unit stat improvements in Magic, Speed, and Luck and operates around the use of Thunder, meaning it’s perfect for any Magic-wielding Unit on your team.
With Olwen’s Dire Thunder Skill, a unit equipped with the Thunder tome will attack twice when initiating combat, allowing you to potentially do twice the number of damage and increase your chances of dealing a critical hit.
Sothe (Emblem Micaiah)
| Bond Ring | Stats Provided | Skill Granted |
| Sothe S | Dexterity +2, Speed +1, Luck +1 | Bane: May reduce foe’s HP to 1. Trigger %=half of Dex. (Certain foes are immune to this effect.) |
Sothe’s S-Rank Bond Ring is one of the strongest available, perhaps even the best Bond Ring in the game.
Not only will it provide bonus points to the equipped Unit’s Dexterity, Speed, and Luck stats, but it also comes equipped with a devastating Skill.
Bane has a trigger rate based on half of the equipped Unit’s Dexterity. Upon this Skill being triggered, any non-boss or special enemy unit will automatically have its HP dropped to 1 on a hit, making for some of the easiest kills ever.
This Skill is also perfect for quickly leveling low Units, as you can equip Sothe’s S-Rank Ring to a high dexterity character, wait until the Bane effect triggers on an enemy, and then have your low-level Unit swoop in to deliver the killing blow, earning extra EXP.
Dieck (Emblem Roy)
| Bond Ring | Stats Provided | Skill Granted |
| Dieck S | HP +5, Strengh +1, Dexerity +1 | Strong Arm: Grants Hit+20 while unit is equipped with a smash weapon. |
Dieck’s S-Ranked Bond Ring is great for frontline fighters or tanky Units whom you’ve equipped with Smash Weapons.
While wielding a Smash Weapon, the Dieck S Bond Ring will also grant +20 to the equipped Unit’s hit rate, enabling them to land more attacks and make an impact with their Smash Weapons.
Eliwood (Emblem Lyn)
| Bond Ring | Stats Provided | Skill Granted |
| Eliwood S | Strength +1, Dexterity +1, Luck +2 | Draw Back: Use to move 1 space away from adjacent ally and pull the ally along. |
Eliwood’s S-Rank Bond Ring provides stat bonuses for Luck, Dexterity, and Strength and offers a lot of utility with the Draw Back Skill.
In combat, the equipped Unit can use Draw Back to move one space away from an adjacent ally and drag that ally back with them.
This essentially lets you swoop in to deal some damage and then dive back out to avoid remaining in melee range of an enemy, and can even be used strategically to reposition allies that are in vulnerable positions on the map.
Chrom (Emblem Lucina)
| Bond Ring | Stats Provided | Skill Granted |
| Chrom S | HP +5, Dexterity +1, Speed +1 | Rightful Ruler: Adds +5% to trigger rate for all skills with trigger rates. |
Chrom’s S-Rank Bond Ring can be incredibly useful for increasing the value you get from Units that have Skills with trigger rates, thanks to the Rightful Ruler Skill.
This Skill adds a bonus +5% rate to all Skills with trigger rates for the equipped Unit, increasing the chances of these bonuses occurring in battle and allowing you to set up some very beneficial strategies and plays.
Edelgard (Emblem Byleth)
| Bond Ring | Stats Provided | Skill Granted |
| Edelgard S | HP +2, Strength +2, Defense +1 | Flickering Flower: If Unit initiates combat, Freezes foe. Trigger % = total damage dealt. |
Edelgard’s S-Rank Bond Ring is another that comes equipped with a Skill to allow your Units to Support and set up plays and viable strategies.
Flickering Flower can trigger if the equipped Unit initiates combat with an enemy and has a trigger percentage determined by the damage you deal with your attack.
When activated, Flickering Flower will Freeze the enemy unit, making them unable to move for one turn.
This allows you to isolate targets and focus them for quick and easy kills and makes a great way of trapping enemies in a select area of the map.
Ryoma (Emblem Corrin)
| Bond Ring | Stats Provided | Skill Granted |
| Ryoma S | Strength +1, Speed +2, Luck +1 | Bushido: If Unit’s level is higher than foe’s, grants Crit+10 during combat, and unit deals +2 damage and takes 2 less damage. |
Ryoma’s S-Ranked Bond Ring is the perfect addition to one of your highest-leveled Units.
The Bushido Skill will automatically grant +10 to the equipped Unit’s Critical Hit rate, deal an extra +2 damage to any attack, and receive -2 less damage from any hit, as long as the equipped user’s level is higher than their foe.
This is essentially a free power-up to any high-leveled Unit, so if you manage to snag this ring, you should plan to equip it to one of your best attackers or someone who already has a high Crit rate, as Bushido will further enhance this strength.
Marisa (Emblem Eirika)
| Bond Ring | Stats Provided | Skill Granted |
| Marisa S | Dexterity +1, Speed +2, Luck +1 | Lethality: When landing a critical hit, instantly kills foe. Trigger %=30. (Excludes certain powerful foes.) |
Marisa’s S-Ranked Bond Ring is another with huge potential thanks to the Lethality Skill.
When this ring is equipped to a Unit, they will instantly kill any non-boss or special enemy when landing a critical hit if Lethality is triggered.
As securing Critical Hits is often so important to getting rid of problem enemies and securing victory in combat, Lethality can make securing a Crit ten times more valuable.
Equipping this ring to a Unit with a high Crit rate will further enhance their potential and make them even more threatening, with zero setbacks.
Have you managed to get your hands on any of these S-Ranked Bond Rings during your playthrough? And if so, which characters have you found the most success in with these rings equipped?
Feel free to let us know in the comment section below, and don’t forget to check out the rest of our content here at Gamer Empire for plenty more Fire Emblem Engage guides to help you on your adventure through Elyos.