In Project Zomboid, playing with friends adds new excitement and collaboration to the survival experience.
Whether exploring the post-apocalyptic world, sharing resources, or defending your base from the undead, the multiplayer feature allows you to team up with your friends and face the challenges together.
Recommended Read: How to Cook in Project Zomboid
In Project Zomboid, you can play with your friends by joining each other’s servers or creating your own.
To join a specific server, select the “Join” option from the main menu, select the “Internet” tab, type Server Password, Account Username, and Account Password, and select “Join Server” to start the game.
You can create your server by clicking on “Host” from the main screen, selecting “Manage Setting” to modify your world, then clicking “Start” to create your server. In your safe house, press “ESC” and select “Invite Friends”. The following window lists all your friends whom you can ask to join by turning the “Deny” button to “Allow”. Lastly, select “Invite” at the bottom of the window.
Table of Contents
How to Play With Friends in Project Zomboid
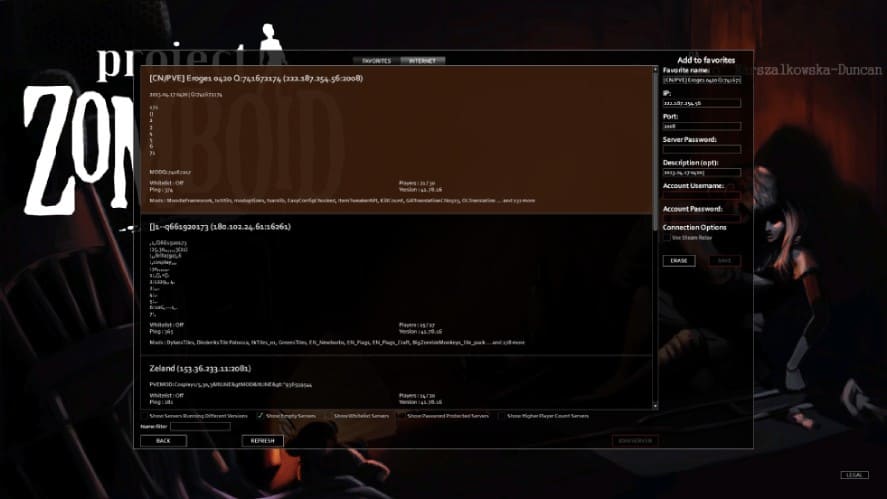
To play with friends in Project Zomboid, select the “Join” option from the main menu, then select the “Internet” tab. Next, the lists will pop up, showcasing all the available servers.
Each server has its own name and specifications, including:
- Whitelist: If the whitelist setting is on, the server is private, and your friends need to correctly type the user and password to join, approved by the host. The default setting is off.
- Ping: The ping value indicates how fast the host’s internet connection is. It’s also advisable to join the server with the lower ping number.
- Players: Indicate the maximum number on that server, up to 126.
- Version: Indicate the host’s Project Zomboid version.
Besides, each server will show the mods the host installs at the bottom of the server section. To join these servers, you have to install the corresponding mods.
Keep in mind that if you play Project Zomboid via Steam, you can only connect to the Steam server.
Click on the server you wish to join, showing more details on the right side of the screen, then type in the Server Password, Account Username, and Account Password.
The Server Password is optional, as some hosts leave it blank.
You can freely fill anything in Account Username and Account Password since it will be your character’s login credentials for that particular server. Account Username will be displayed on top of your character, while the password will prevent others from playing your character on that server.
You can click “Save” to keep the server the next time you play, which will be moved to the “Favorites” tab.
Finally, select “Join Server” to start the game.
Not to mention that the day and all events in the game are dependent on the host, meaning you might not start on the first day of the apocalypse like in Singleplayer.
How to Invite Friends to Your Server in Project Zomboid
Playing a game with your server is more private and collaborative than joining others.
From the main screen, click on “Host” to create the server. Next, click on “Manage Setting”. If this is your first time hosting the game, click on “Create New Settings”, type in your server name, and click “Next”.
Thanks to the Edit Settings window, you can configure many things. Here are some of the interesting settings you should pay attention to.
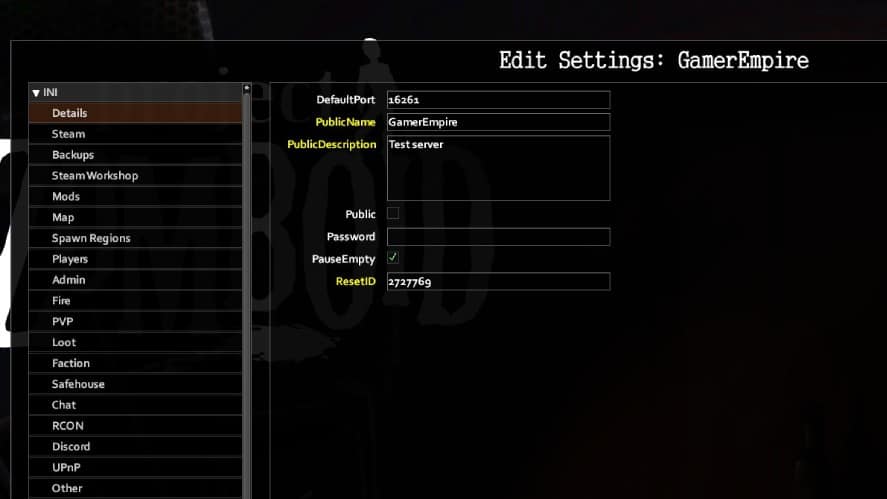
1. Details
By ticking the “Public” box, you can determine whether your server is shown in the in-game browser. Consider skipping it if you already have a group of friends.
Next, the “Password” text allows you to set the password for your server. Once again, you can ignore this text if you don’t publicize your server.
The “PauseEmpty” is the feature that will halt the game’s events and progress when all the players are out. It’s recommended that you tick this box to avoid any change without caution.
2. Steam Workshop
This feature allows you to add mods from Steam to your server. Keep in mind that you should enable them first in “Mods” from the main screen.
3. Spawn Regions
This window showcases 4 default locations in Project Zomboid. You can restrict any spawn location by clicking on it and selecting “Remove Region”.
4. Players
Type in the number of players you want in the “MaxPlayers” box (the default number is 32). Moreover, you can type in the names of the items in the “SpawnItems” box so that every player will spawn with them.
Enabling “SleepAllowed” allows your characters to choose to sleep when they’re tired. On the contrary, choosing “SleepNeeded” means that your characters need to sleep when they’re tired. You can ignore “SleepNeeded” if you disable “SleepAllowed”.
“PlayerBumpPlayer” means when players collide while running, they’ll fall. This feature enhances the game’s realism.
The rest settings have been finely tuned to their optimal settings but feel free to try things out to fit your taste.
5. Loot
In Loot, consider changing “HoursForLootRespawn”, which allows items to respawn after the chosen time.
The default time is 0, meaning all items will never respawn again after being looted the first time. Hence, you should increase it to 72 hours.
6. Time
In Time, the default setting of “Day Length” is 1, which means 1 hour in real life is equivalent to 24 in-game hours. Nevertheless, it’s advisable to increase it to 2 in order to complete more activities daily.
7. World
In World, the “Hours for Removal List” indicates the hours since an item was dropped on the ground before removal. The default value is 24 hours, but you should increase it to 48 hours to maintain more frequent resources.
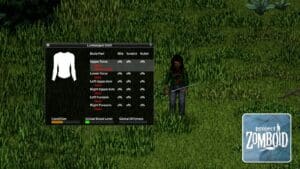
You can determine which items should be removed after 24 hours by manually typing their names in the “World Item Removal List” (Shirts, blouses, shoes, glasses, etc.) setting, or you can tick “Removal List as Whitelist” to let all items, except for items in the “World Item Removal List” box, to be removed after 24 hours.
8. Character
Gaining XP in Project Zomboid is a true challenge. Thus, in character, you should increase the “XP Multiplier” to 2 instead of 1 (by default). Additionally, don’t forget to tick “XP Multiplier Affects Passive Skills”.
Besides, enabling “Weapon Multi-Hit” allows you to hit multiple zombies in a single swing. This feature applies to all weapons, like axes.
9. Zombie Lore
Most settings for this feature are optimal for multiplayer, except “Transmission”. The default setting is Blood + Saliva, meaning you can be a zombie if the undead cause an open wound. However, you should change to Saliva, as it reduces the chance of zombification, except for being bitten by the undead.
When all the settings are completely customized, click “Save” and return to the Host game window.
Click on the server name, which shows a list of servers you created, and choose the previous server.
It’s essential to closely examine “Server Memory”, as you need more GB when there are more players. Specifically, for every additional 2 players, you should increase the Server memory by 1GB. Therefore, the high specs computer of the host plays a vital role in hosting.
Finally, select “Start” and wait for the server to run, then join the game.
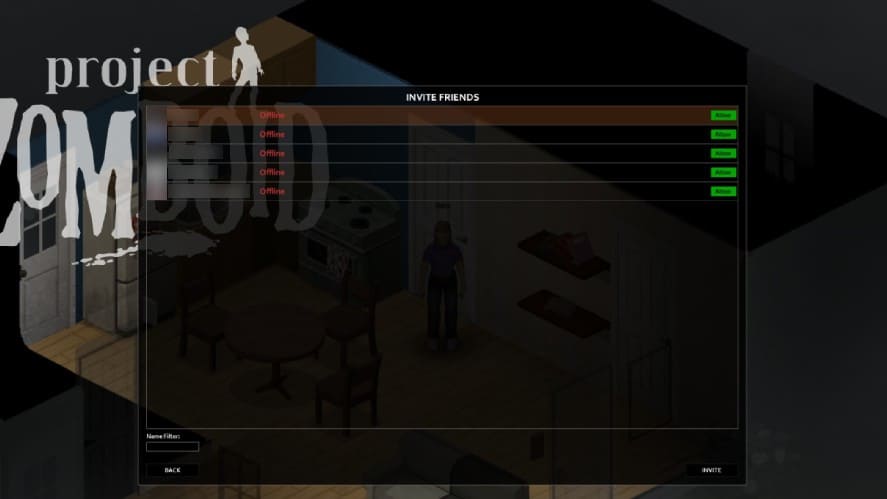
When in the safe house, press “ESC” and select “Invite Friends”. The next window lists all your friends whom you can ask to join by turning the “Deny” button to “Allow”. Lastly, select “Invite” at the bottom of the window.
Keep in mind that only your Steam friends are visible on this list.
You can check your friend’s presence in your host by pressing “ESC” again, clicking “Players”, and checking his name in the tab.
That’s how to play with friends in Project Zomboid!
Have any suggestions for this guide? Let us know in the comment section below.