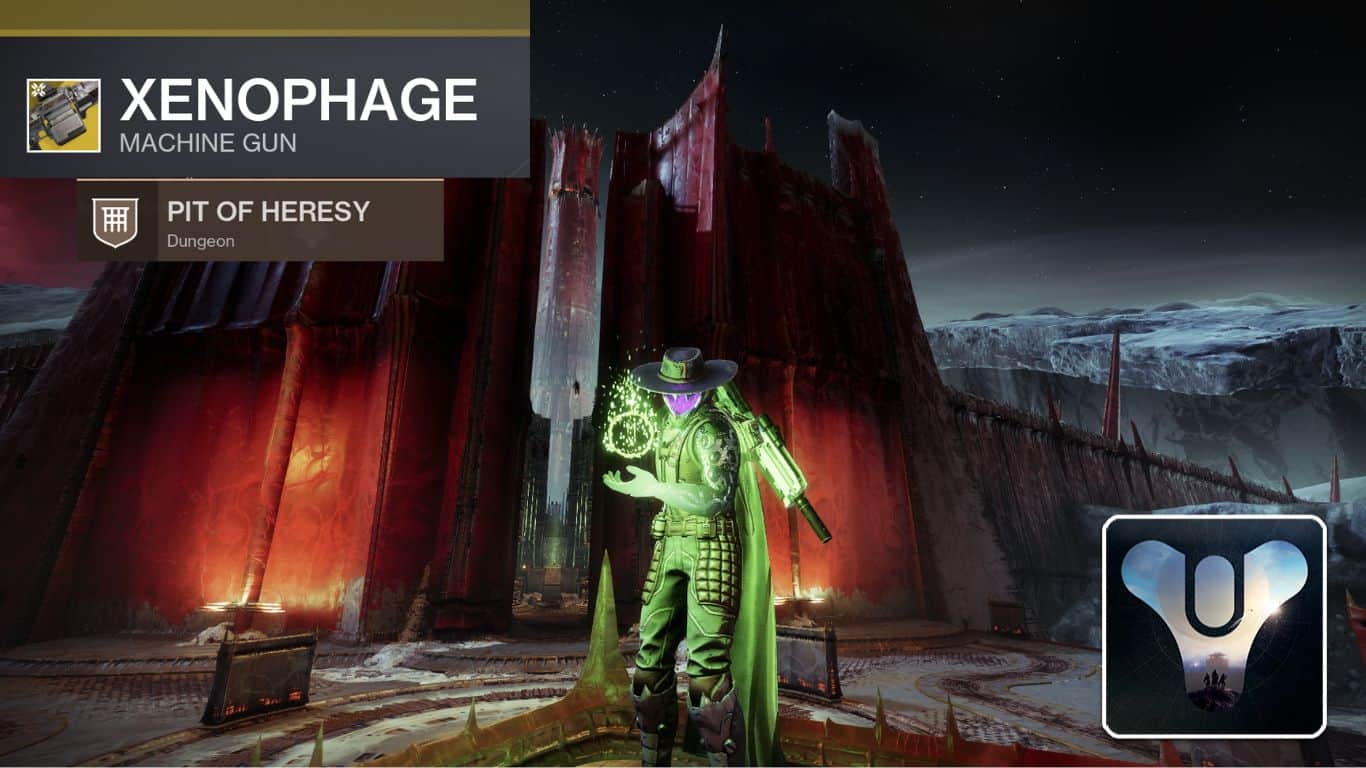
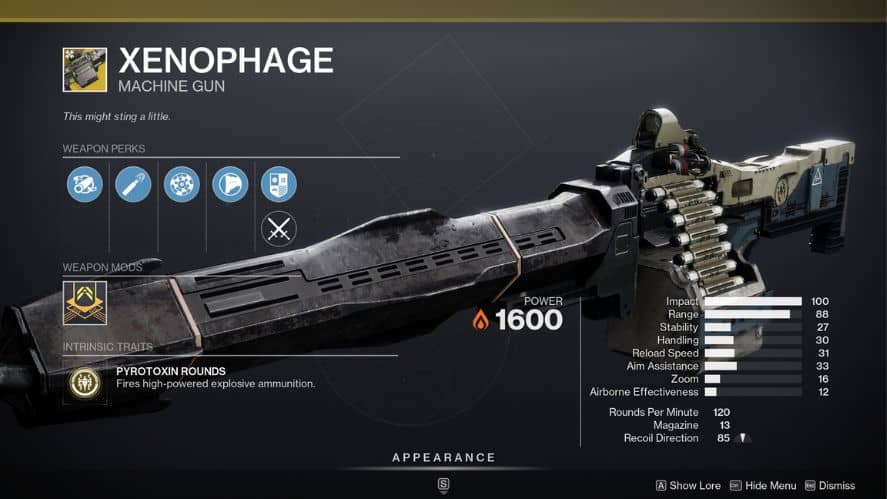
Xenophage is a monster Exotic Machine gun that every Destiny 2 player should have unlocked.
If you are a newer player and want to unlock the Xenophage, this is the guide for you!
Recommended Read: How to Get Malfeasance in Destiny 2
To get the Xenophage Exotic Machine Gun in Destiny 2, complete the Journey Exotic Quest that begins in the Enduring Abyss on the Moon.
Table of Contents
How to Get Xenophage in Destiny 2
The Xenophage Exotic Questline is only available to players who own the Shadowkeep Expansion and have completed the Shadowkeep campaign.
You may find the Journey Exotic Quest in your Exotic Quest Kioske in the Tower. If not, then you will need to visit the Moon to begin the questline.
Head to Sorrow’s Harbor and continue on into the Enduring Abyss. Here, you will be greeted by four Thrall statues. Interacting with a statue will activate it.
You will need to activate all four statues in the correct order, starting with the front right statue, then the back left statue, then the back right statue, and finally the front left statue.
You should see a chest appear. Opening this chest will grant you the Journey Exotic quest.
Next, you will need to visit the Anchor of Light on the Moon. Towards the very left of the area, you will see a small building. Inside, there will be a ball of Light.
You will need to pick up this Light and use it to light six lanterns within the Anchor of Light. You will have a Torch Bearer buff with a countdown timer. If this timer runs out, you will need to start over from the first lanter again.
The order you light these lanterns matters. Here is a map to help guide you.
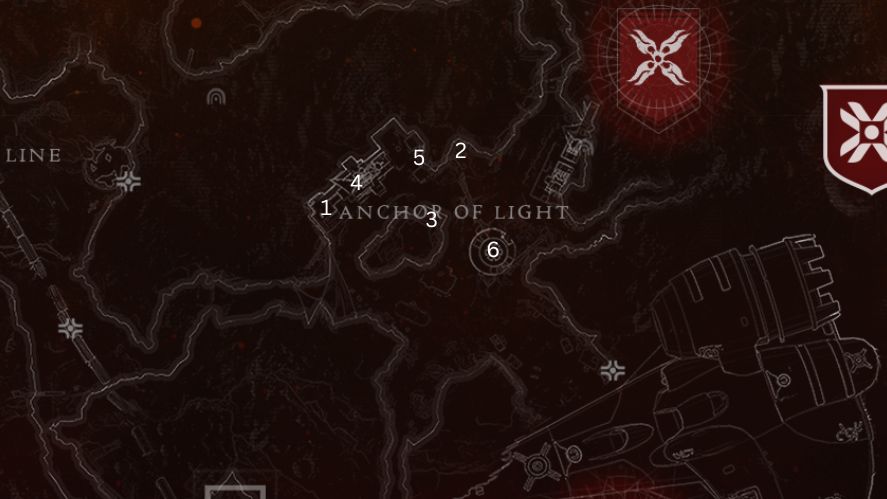
Lighting the wrong lantern will have you restart the entire process, beginning back at the first Light pickup. Note that the final lantern is on top of the disk-shaped room, not inside.
After lighting the last lantern, you will see a waypoint pop up near the first lanterns. You will deposit the ball of Light here to complete this section of the quest.
Next, you will need to complete all four of the Lost Sectors on the Moon.
These Lost Sectors include the K1 Logistics at the top of Archer’s Line, the K1 Communion at the top-right of Anchor of Light, the K1 Crew Quarters at the bottom-left of Hellmouth, and the K1 Revelation in the middle of Sorrow’s Harbor.
At the end of each Lost Sector, you will be met with a wall of Hive runes in a 3×3 grid with a single smaller symbol above. Shooting these runes will shuffle the symbols.
Shooting the smaller rune above will reset the symbols. You need to make all of the symbols match the smaller symbol floating above to complete the puzzle. Doing so will spawn a chest that completes a step of the quest.
While you could try to decipher your own symbol-shooting pattern, there are some easily accessible patterns that the community has come up with that will always work.
Think of the 3×3 grid as a number pad, similar to your keyboard, except upside-down. The 1 is in the top-left position, and the 9 is in the bottom-right.
From here, you should be able to enter these number combinations to complete each of the Lost Sectors.
- K1 Crew Quarters: 3, 4, 5, 8, 9, 9, 8, 8
- K1 Communion: 7, 9, 2, 2
- K1 Revelation: 6, 4, 5, 5, 4, 8, 5, 2
- K1 Logistics: 1, 7, 6, 5
Note that, if one of these Lost Sectors is the weekly Legendary Lost Sector, you do not have to complete the Lost Sector on Legendary difficulty.
Simply walk past the activity flag and head into the Lost Sector as you normally would.
After completing all four Lost Sectors and their puzzles, you will begin the final step of the Journey quest by entering the Pit of Heresy Dungeon on the Moon.
Pit of Heresy
Launch the Pit of Heresy Dungeon from the Moon directory. After beating the first encounter, you will be met with a wall of doorways, each with a rune chained above it.
One door will not have a rune. This is the door second from the left on the top row. Jump up to this door. Inside you will find a rune. Interact with it to continue on with the quest.
After entering the correct door, you will drop down into the ogre maze. Run down the left path towards the chasm. You should see a ledge below that you can jump to.
Near the edge of the ledge, you will see an interactable plate. Activating it will bring up a series of platforms that lead to another ball of Light.
Grab the ball of Light and take it to the exact opposite side of the encounter, the far right tunnel. You can do this either by using the underground tunnels or heading back to the start of the encounter.
After reaching the right tunnel, you will find two braziers by a locked door. Interact with both of these braziers to light them and open the door.
There will be an ogre that is constantly patrolling past this door, so you will need to be quick. If you die with the orb, you can always go back to the floating platforms and pick it up again.
After opening the door and continuing down the maze, you will meet the final Boss Wizard for this quest.
To damage the Boss, you will need to deposit the ball of Light that spawns at the center of the room into the correct brazier.
The first room you enter with all of the Thrall will have four elemental orbs in each of the corners of the room.
Each orb will have a symbol above it, denoting the type of element. Use these as a reminder once the encounter begins.
After picking up the ball of Light, you will receive one of four Dread buffs. Abyssal Dread is the Void symbol meaning you will deposit the light at the top back left brazier.
Neutral Dread is Kinetic and is located at the top front right. Thunderous Dread is Arc and is located in the bottom back left. Fiery Dread is Solar and is located in the bottom back right of the encounter.
The brazier that you deposit the Light in will determine the type of elemental damage that is required to damage the Boss.
It is a good idea to have a balanced Loadout that can deal Solar, Arc, Void, and Kinetic damage. Hardlight is a great weapon for this encounter.
You will have a 25-second window to damage the Boss after depositing your Light. After the 25 seconds is up, you will need to pick up the orb of Light once more and repeat the process until you finish the Boss.
After killing the Boss, return to Eris Morn on the Moon to receive your Xenophage.
These are all the steps needed to unlock the Xenophage Exotic Machine Gun in Destiny 2!
This is a very fun questline. Are you having issues with a particular section of the Xenophage quest? Let me know in the comments!