Getting a lot of kills in Destiny 2 takes time. Having a good method for farming kills is crucial to speeding up the process.
Today, we have a list of the best farming methods you can use to get your objectives done in a reasonable time.
Recommended Read: How to Emote in Destiny 2
The best place to farm kills in Destiny 2 is the Breakneck Mission from the Lightfall campaign.
Table of Contents
Best Place to Farm Kills in Destiny 2
From Catalyst completions to daily Bounties and crafted weapon leveling, there are a lot of reasons you will need a good, consistent spot for farming kills in Destiny 2.
While you can complete these objectives passively throughout your play sessions, it will take quite some time without a dedicated farming spot.
Veteran players may remember the good old days of the Loot Cave, new players will want to take a look at one of these farming spots on this list if they are to complete their challenges and Quests as quickly as possible.
To pick the right spot for you, consider the setup time it takes to get to the spot, the types of enemies in the spot, as well as what kind of ammo you will need during your kill farm.
Shuro Chi
Raids have always been a great choice for farming kills, as you can count on hoards of enemies spawning as soon as the encounter begins. Since the release of the Last Wish Raid, the community has taken to Shuro Chi for all of their farming needs.
Shuro Chi is the Boss of the second encounter in the Last Wish Raid. What makes this encounter great is the raw amount of Thralls that spawn immediately after the doors open to the encounter.
Players can expect upwards of 80 enemies to spawn during their time in this encounter before they inevitably wipe and start all over for another round of farming.
There are a few Knights, though the majority of enemies you will find are simple Minor Thralls.
The best part about using a Raid checkpoint as your kill farming method is the fact that you have access to Raid Banners, granting you a refresh to Special ammo, Heavy ammo, and all of your abilities before the encounter begins. This is necessary if you plan on farming kills with anything other than your Primary weapon.
You can purchase Raid Banners in bulk from Soraya Hawthorne in the Tower for pretty cheap. From there, all you need is a checkpoint to the Shuro Chi encounter, and you can begin farming kills.
To get to the checkpoint, you would normally need a Fireteam to help you complete the first encounter of the Raid. Luckily, we can bypass this and get to Shuro Chi completely solo using the Wall of Wishes.
Head into the Last Wish Raid from the beginning, and before making your way into the first encounter, take a left and jump up the rocks until you find your way to the Wall of Wishes.
From here, you will shoot the circles on the wall to cycle what symbol is displayed on them.
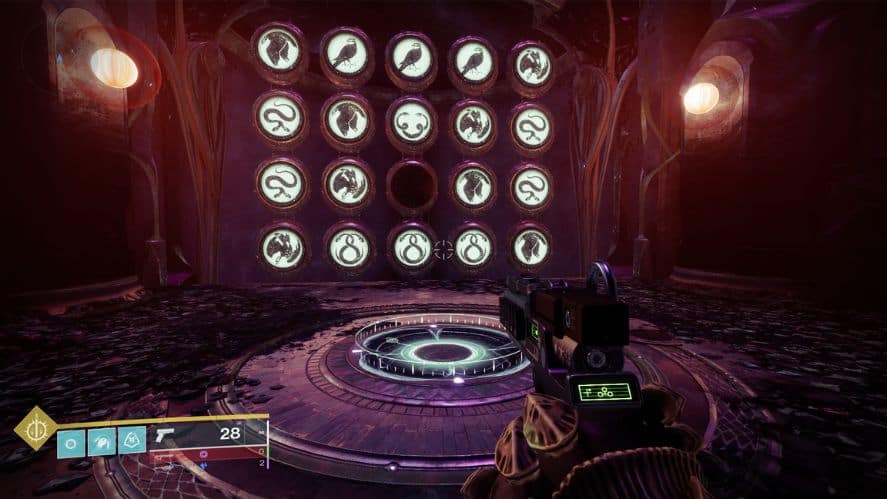
Create the pattern shown above and step onto the plate to activate the wish. This will teleport you directly to the Shuro Chi encounter. Make sure that you start the encounter and wipe to save the checkpoint to your character.
From here, all you have to do is rally at your Raid Banner, open the door to begin the encounter and start killing every enemy that spawns.
Eventually, the Boss will begin the wipe mechanic, and you will die, placing you back at the start of the encounter for another run.
Breakneck Mission
If you don’t own the Last Wish Raid or just don’t want to deal with the Wall of Wishes, the Breakneck Mission is a close second for farming kills and has become the go-to method for many players. This is the fourth mission of the Lightfall campaign.
After completing this mission on your first playthrough of the campaign, you will unlock it as a replayable mission on Neptune.
Load into the mission, preferably on Normal difficulty, and make your way to the checkpoint immediately after you use Strand to Grapple.
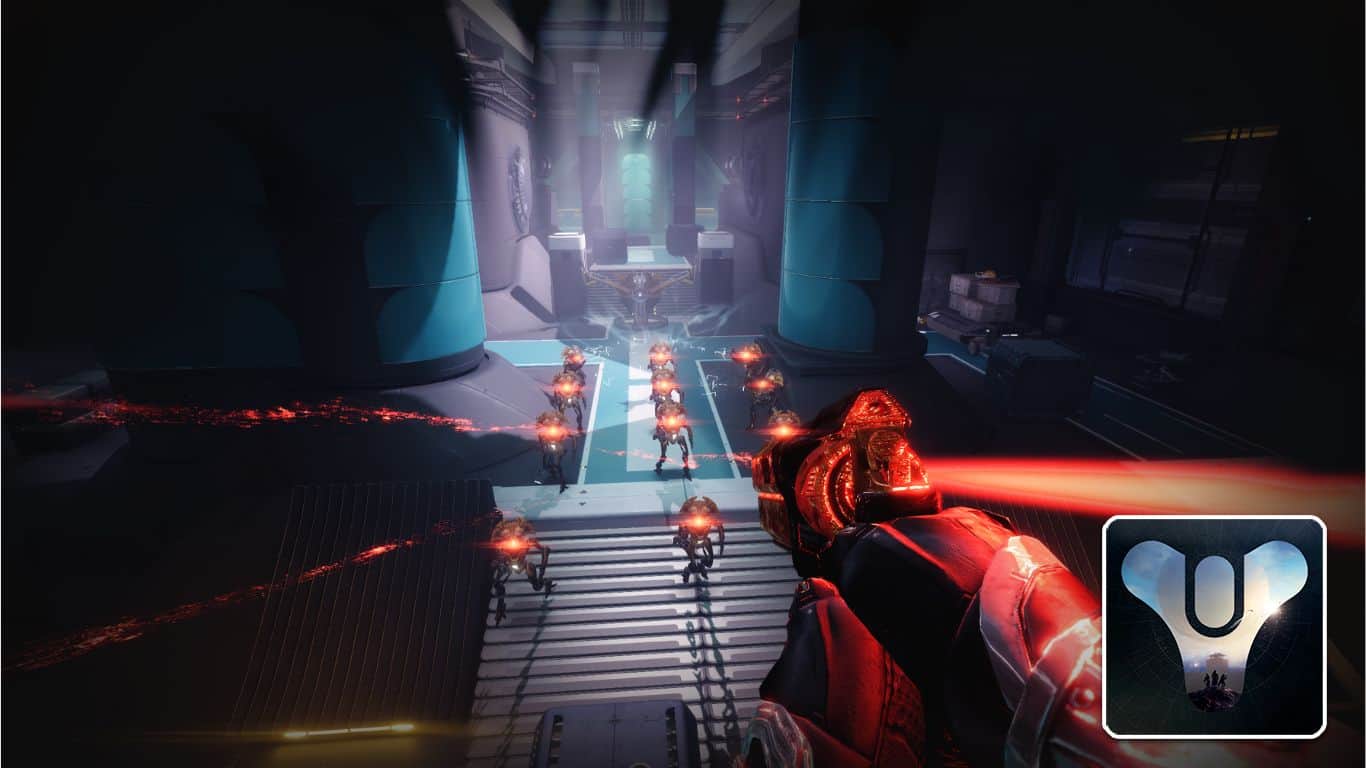
When you are forced to break a door to get to the next section, you will see a Rally Banner. This is the checkpoint you will want to farm.
Stepping into the room will spawn many enemies, about 45 in a single room. Kill as many as you wish but do not go past this room or you will lose the checkpoint.
You will also want to make sure that you leave at least one enemy alive inside of this room. Killing all of them will also move your checkpoint further along in the mission.
It is easiest to leave one of the Wyverns alive and kill every other enemy in the room. Once all of them are gone, allow the Wyvern to kill you to send you back to your checkpoint.
While 45 enemies per checkpoint may not seem like much, especially when compared to the 80+ available in the Shuro Chi encounter, The Breakneck Mission has something that Raids do not.
Campaign Rally Banners are not the same as Raid Rally Banners. While you have to purchase and consume Raid Rally Banners, Campaign Banners are both free and infinite in use.
This means that you will still get a full refresh on your ammo reserves and abilities at the beginning of every checkpoint without having to spend resources on them. This can save you hundreds of Raid Banners in the long run.
Another plus to using the Breakneck Mission is that campaign mission checkpoints do not reset, unlike Raid and Dungeon checkpoints which reset at the beginning of every week.
You can reuse your Breakneck checkpoint however many times you need, whenever you need, and it will always spawn you where you need to be.
Ecthar
The Ghost of the Deep Dungeon has yet another great encounter for farming kills. Many players even consider this method more efficient than Shuro Chi.
Ecthar is the first Boss inside of the Ghost of the Deep Dungeon and the second encounter in total. To get to him, you will need to complete the first puzzle encounter.
This encounter is entirely possible to complete solo, though it will take some time, and you will need to make sure you do not die and restart the encounter.
The alternative to completing the first encounter is to find someone with an Ecthar checkpoint and have them give it you to.
To do this, join any player with the Ecthar checkpoint and have them begin the encounter. Once it has started, you will need to wipe and respawn before the checkpoint is saved to your character.
You can now leave the Fireteam and load into the Ghost of the Deep Dungeon on your very own Ecthar checkpoint. You can find plenty of Guardians willing to give out weekly checkpoints inside of the official Destiny 2 LFG Discord.
Once you are at Ecthar, you will have access to Rally Banners just like you would in a Raid. Again, perfect for when you need to farm Heavy weapon kills or Special weapon kills.
Starting the encounter will spawn many, many enemies for you to kill. This includes some pesky Knights and exploding Moth enemies, along with a slew of Minor enemies.
Unlike the first two farming methods on this list, there is no limit to the amount of enemies that will spawn in during the Exthar encounter. So long as you can stay alive, enemies will continually pour out of the doors to either side of the encounter for you to farm.
This encounter is great for farming Primary weapon kills, as you may end up running low on Special and Heavy ammo reserves. The only downside to this encounter is the Power Level.
As this is a newer Dungeon in Destiny 2, the Power Level is set to 1800. Enemies will not only be harder to kill but will also deal more damage to you than normal, making it somewhat difficult to stay alive if you are not properly Power Leveled for the Dungeon.
This method is only recommended if you are higher than Power Level 1800 and are capable of staying alive during the encounter. If you have trouble getting more than 40 kills before dying, you may consider using a different method on the list for farming your kills.
Thrall Way
Along with the release of the Last Wish Raid came the Shattered Throne Dungeon. There are a lot of enemies in this Dungeon, though one section sticks out more than any other in terms of enemy density.
The Thrall Way was affectionately named by the community for the sheer amount of Thrall enemies that spawn during this part of the Dungeon.
While this can be a brutal section to get past during a normal run, we welcome the abundance of enemies for farming purposes.
To get to the Thrall Way, you will need to complete the first puzzle encounter of the Dungeon and traverse the platforming sections as you normally would. Just like Ecthar, you can get a checkpoint past the first encounter from a friendly Guardian to speed things up.
Once you get to the end of the Ogre platforming section, you will be at the entrance of the Thrall Way. Stepping inside of the door will slow your movement speed and restrict your jumps.
During this section, Thrall enemies will continually spawn in from all corners of the encounter and run straight at you. You will never have to wipe to get the Thrall to spawn again.
If you find yourself a nice ledge to stand on, you can safely shoot all of the Thralls without being in any real danger. Just make sure that you do not go too far into the encounter, or you risk making the Thrall stop spawning.
Healing can still be an issue in this encounter. It is a good idea to bring any sort of healing abilities you can, just in case.
You won’t have access to any Rally Banners, though, with a few Ammo Scout Mods, you should be able to pick up Special and Heavy ammo bricks just by killing enough Thrall.
While this farming method requires a bit more setup than most, it makes up for it in convenience. You never have to wipe to get enemies spawning again, and you don’t have to be 1800 Power Level just to survive.
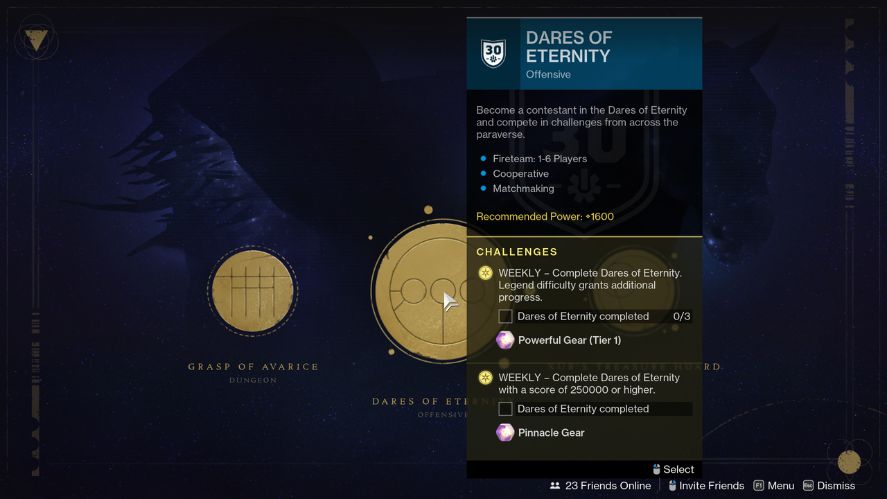
Dares of Eternity
The final farming method is also the simplest. Surprisingly, the Dares of Eternity activity can be a great source for farming any type of weapon or ability kills.
This activity is free to all players. You will be joined by a full Fireteam of five other players and put into an arena to kill as many enemies as you can while completing small objectives to progress the activity.
There are a variety of power-ups that you can pick up during the activity. These range from increased movement speed to ability regeneration, making it easy to farm Grenade or Melee kills when needed.
The Starhorse’s Favor Buff grants players infinite Super ability usage and infinite Heavy ammo. This is ideal for farming Exotic Heavy weapon Catalysts and Super ability final blows quickly.
You will have two chances to get the Starhorse’s Favor Buff. The first is immediately after the first encounter is completed.
You will have to make sure that you complete the following platforming section without falling into the lower section. Staying on the upper section until the very end will grant you the Starhorse’s Favor.
To ensure you always make the initial jump to the platforming section, walk backward into the gravity shoot. This will phase your character through the giant spinning wheel and avoid ever colliding with it.
If you fail the platforming section, you will need to complete the next encounter before you get another chance at obtaining the buff.
You and your Fireteam will need to guess the randomized final Boss of the activity by standing on one of three platforms on the ground.
Everyone standing on the correct platform will be given the Starhorse’s Favor
These are the best ways to farm kills in Destiny 2.
Do you have a different method you like to use for farming kills? Let me know in the comments!