War is a complex thing, and Mount and Blade 2: Bannerlord uses many of history’s formations to let us battle exactly how we want to.
However, with so many possibilities, one might become confused and not know exactly which formation to use and when to use it.
Recommended Read: What Is the Best Horse to Use in Bannerlord?
Some of the formations are more powerful depending on the circumstances, so knowing when they work best and for what unit types they actually make a difference will make the difference between life and death.
So, to help you become a true general of Calradia, here is a detailed battle formations guide for Mount and Blade 2: Bannerlord.
Table of contents
- How battles work in Bannerlord
- What are battle formations in Bannerlord
- Each battle formation and how to use it best in Bannerlord
- Best formations for each troop type in Bannerlord
How battles work in Bannerlord
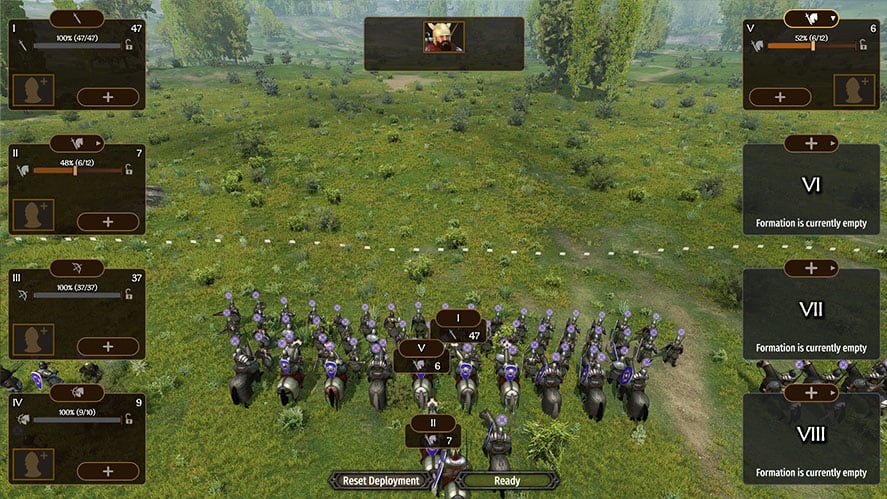
When you go into battle alongside your troops, you will have the opportunity to create formations made out of different types of troops.
There are a few major unit type squads you can have in your army:
Each one of the 8 formations you can create will be represented by one of the unit types listed above.
During a battle, you can command any of the squads and make them either realign themselves in various complex formations or send them to attack.
Your job is to properly command your troops and use special formations when needed to win the battles.
What are battle formations in Bannerlord
This might be a bit confusing, but formations in Bannerlord may refer to two things:
- The 8 squads you bring into battle
- The way your squad organizes itself to fight
For your convenience, we will call formations only the second definition, and we will call the unit type formations squads.
Battle formations will allow your troops to create various geometrical shapes in order to properly combat their enemies.
You can use formations such as the circle, the square, or the very famous shield wall. Using these formations, you can properly command your troops in Bannerlord and get the upper hand even when you have fewer troops.
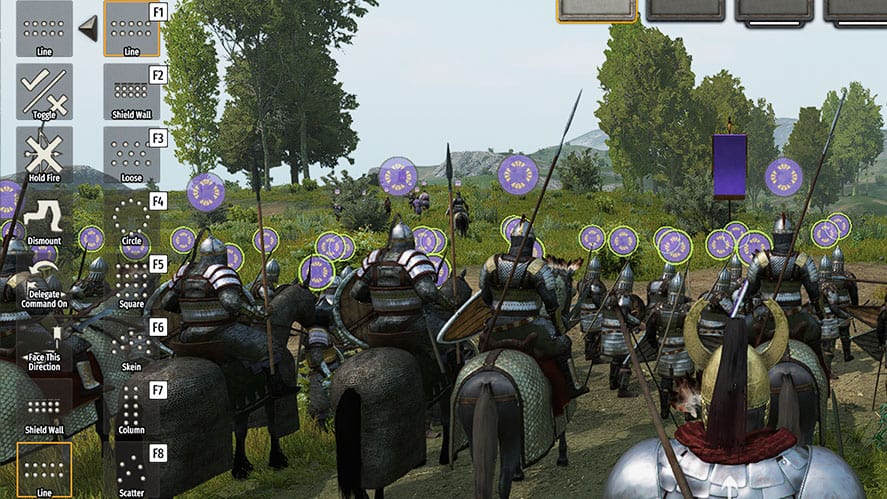
Each battle formation and how to use it best in Bannerlord
There are exactly 8 battle formations in Bannerlord, and each one has its advantages and disadvantages.
Line Formation
The Line formation is the bread and butter of Bannerlord. It is the most popular and used formation, as it is used by default in the game when you enter battles.
The AI will usually use the Line formation 80% of the time, and it will not break from that formation until they retreat.
The formation is exactly what it sounds like: it is a straight horizontal line in front of you, made out of troops. It is straightforward and easy to use, so this is what players should learn in the beginning.
The Line formation is good enough for infantry, ranged, and cavalry units, though it might not be the best during special circumstances.
Shield Wall Formation
The Shield Wall formation is renowned in history for being extremely efficient. Well, in Bannerlord, depending on the circumstances, it can be the best formation you can use.
This formation is specialized in defense, so don’t use it if you are the powerful attacker that hopes to destroy its enemies.
However, in a siege, a shield wall might be the way to go, as it can help your infantry keep ranks properly and push back the invaders.
Funnily enough, the shield wall is good for ranged archers and crossbowmen as well since many enemies in Bannerlord can get overwhelmed if they get in close range and they find troops huddled together.
Loose Formation
The Loose formation is best used by troops with ranged capabilities, as it allows them to properly maneuver against enemy ranged attacks and to get out of trouble fast if necessary.
However, the Loose formation can be incredibly dangerous if you use it for infantry, as their ranks will fall too easily and will then be flanked.
Try to keep this formation for your ranged and horse archer squads only.
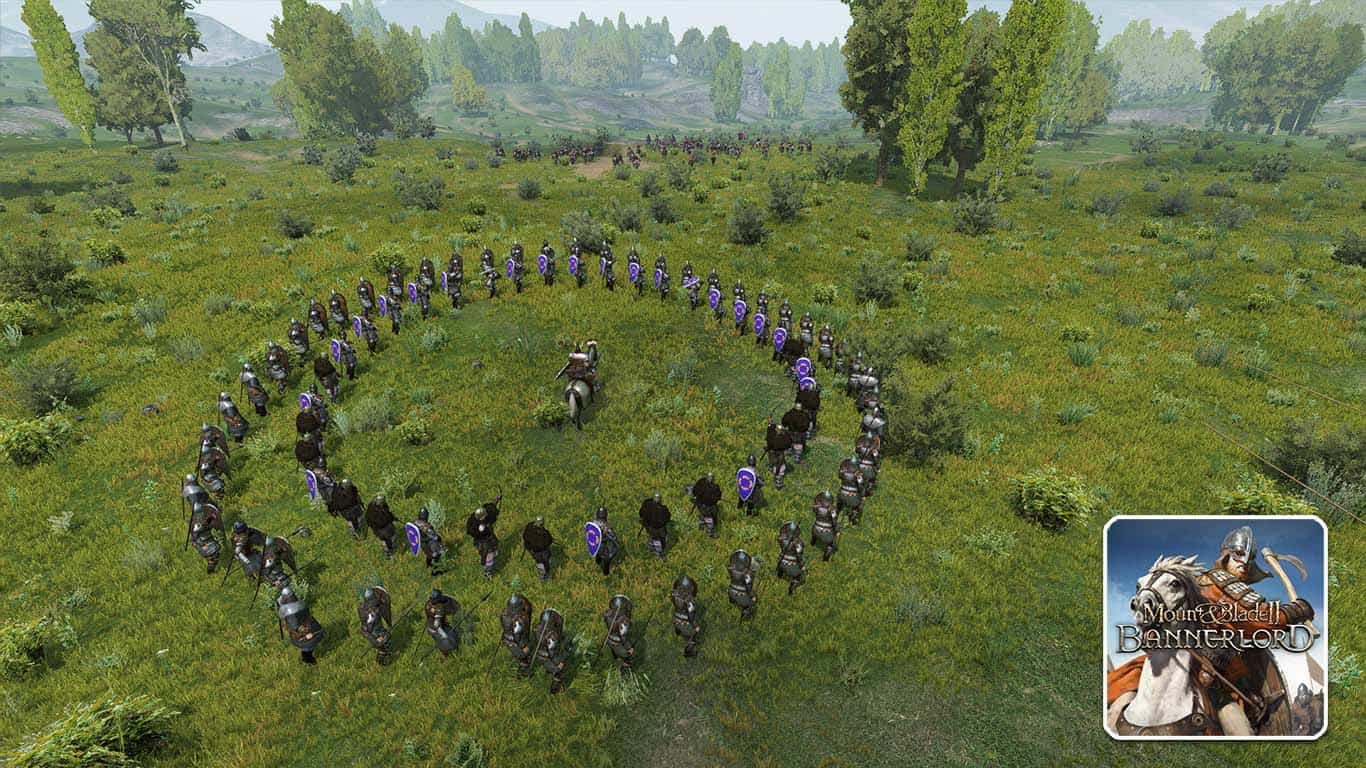
Circle Formation
The Circle formation is a funny battle formation. Though it was useful in the past, it isn’t the most efficient one for how Bannerlord works.
Best used as a “last stand” formation, the circle is supposed to keep the center safe while being flanked from all directions.
Unfortunately, there are almost no circumstances where you should ever find yourself needing the Circle battle formation.
It does look gorgeous, though, so you should use it at least once in your life but never again afterward.
Square Formation
The Square battle formation can be extremely efficient against an enemy AI that uses a Line formation that is just too long.
Though your troops will most probably, get flanked, it won’t matter since they will always have someone in the back to reinforce.
The Square formation can be incredibly deadly if used correctly. It is also really good against cavalry charges, as they can seem to pass through so many troops huddled together.
Skein Formation
The Skein battle formation is probably the most beautiful and efficient formation in Bannerlord.
Making your troops form an “arrow” formation is surprisingly efficient, as you can break through any Line formation and then take out both flanks.
It is a really good formation that works for both infantry and cavalry squads. There really aren’t any downsides to using the Skein formation in Bannerlord.
Column Formation
The Column battle formation should just be ignored. It works the same as the line, but it doesn’t use the full capacity of your troops.
Only the units at the front will fight while the rest stand and watch. It is a dreadful formation, so avoid it at all costs.
Scatter Formation
The Scatter battle formation should be good, in theory, for ranged troops. However, it just makes your party look like a mess, and the troops in the squad can easily be picked off one by one.
Don’t use the Scatter formation in Bannerlord.
Best formations for each troop type in Bannerlord
Infantry
If you have a squad of shield or shock infantry, your best bet is using the Skein formation. It can break through anything, even if you don’t charge and just hold your ground.
Another formation that could work for these troops is the Line formation. However, if your Line is longer than your enemies, change right back to the Skein formation.
If two Line formations fight, the one that is shorter will usually win. However, if your formation is too tight because you want your Line to be shorter, you will lose. So be careful when doing a Line formation fight.
Cavalry
Cavalry should always use the Charge command when you want them to fight, so it does not really matter what formation they have before you send them on the offensive.
However, there are some tactics that can work great for the cavalry squads. First of all, having more than one cavalry squad can make your battles a lot easier.
Cavalry has a tendency to get stuck in close combat and when they want to retreat to prepare another charge, they get annihilated.
To fix this, create 2 to 3 equal squads of cavalry and set them all to the Skein formation. When they are close enough to flank the enemy from both sides, send them all charging,
This will result in a massacre for the enemy troops, as they won’t know which way to attack or defend.
Ranged
Ranged troops should always use the Loose formation, and they should always hold their position. Don’t make them engage or run around like idiots.
If ranged troops hold their ground, even a cavalry charge can fail against them. If you do see a cavalry charge coming for your archers, quickly set them up in a Shield Wall and be amazed at the fact that your ranged units can easily beat a cavalry charge.
Horse Archers
Horse archers should keep a Loose formation most of the time. However, for this type of troop, the best thing you can do is either Charge or Delegate.
Horse archers tend to get things done by themselves, and leaving them to skirmish might be the best thing you can do.
That’s everything you need to know about battle formations in Mount and Blade 2: Bannerlord!
Have any input or suggestions for this guide? Let us know in the comment section below.