One of the big concerns you have to deal with when the power shuts off is the lack of clean water. While water from your supply is insufficient, plumbing can solve the problem.
In this guide, we’ll show you the plumbing guide, including how plumbing works and how to do plumbing in Project Zomboid.
Recommended Read: Project Zomboid – Complete List of Animals
Plumbing is a system that allows you to create a clear water source from tainted sources without using electrical resources or fuel.
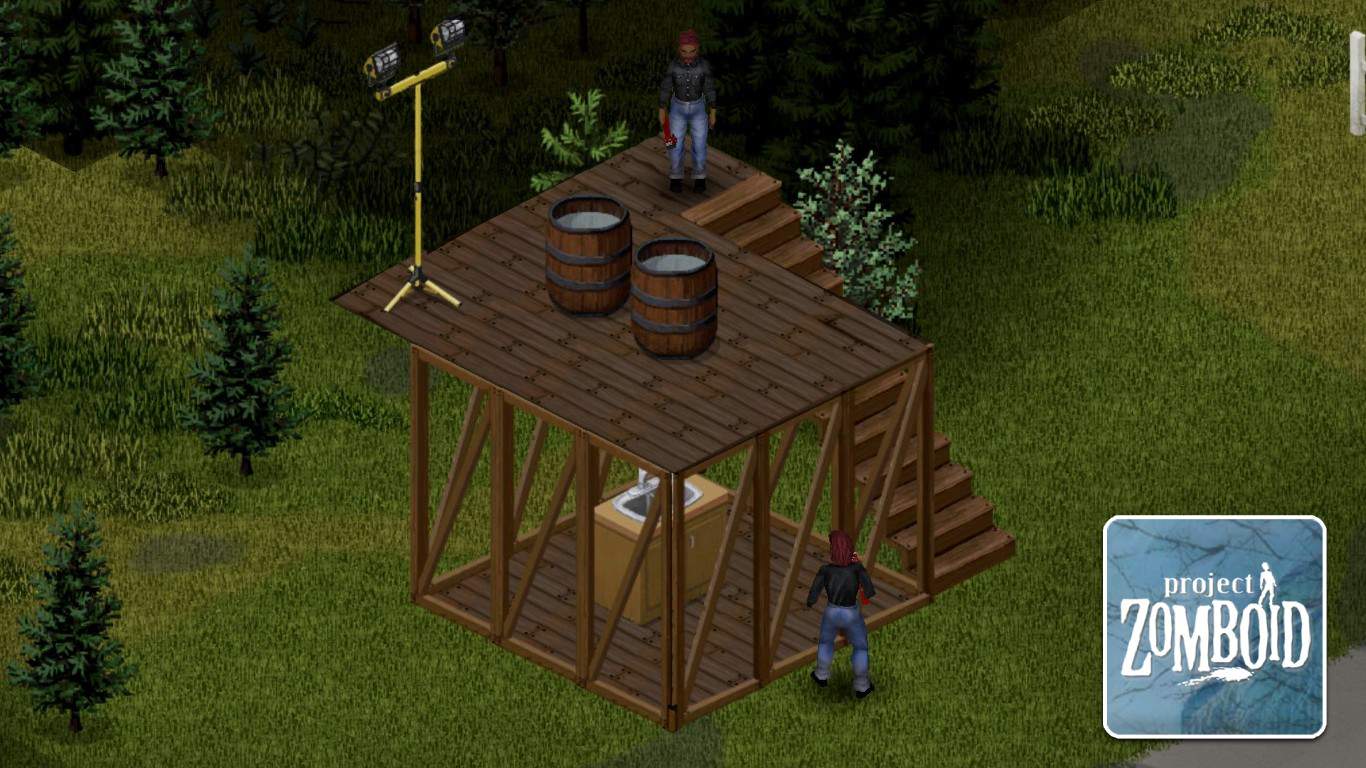
To do plumbing in Project Zomboid, you need to place a water storage source (a rain collector barrel, for example) in the same tile and one floor above water equipment (sink, toilet, bathtub, etc.) and cover it with wall frames. Finally, right-click on the water equipment and select “Plumb <Equipment Name>” to finish the installation.
Table of Contents
How Does Plumbing Work in Project Zomboid?
In Project Zomboid, plumbing is a system that allows you to connect specific water equipment (sinks, washing machines, bathtubs, etc.) to water storage items (rain collector barrels, cooking pots, etc.), creating a clear water source.
The system can work permanently as long as its connected parts (rain collector barrels) still hold water. This is an awesome method to convert tainted water into clean water when the power shuts off.
Here’s the thing: the system only works if the water storage items (rain collector barrels) are placed 1 floor above specific water equipment (sinks, bathtubs) and vertically on the same tile. Otherwise, you can’t connect them.
Besides, the water equipment must be placed in an enclosed area. So, consider bordering it with wall frames if you intend to place it outside.
In some cases, the water storage items aren’t necessarily the rain collector barrel, they can be other toilets or bathtubs (as long as they’re above the floor and vertical to the sink below), and the system will work as well.
How to Do Plumbing in Project Zomboid
Now that you know how plumbing works in the game, here is how to set it up for yourself!
Prerequisite Items for Plumbing
Honestly, it’s better to do plumbing only at your own base than anywhere else. Plumbing takes much effort, so you need to decide where you want to set up plumbing in your base to avoid wasting time and resources.
Here is a list of items and their purposes in plumbing systems:
- Wrench, Pipe Wrench: used to plumb, pick up and install sinks, bathtubs, or toilets.
- Hammer, nails, planks: used to craft wooden floors, stairs, and wooden wall frames in case you want to set up the plumbing outside.
- Garbage bag: a material for crafting rain collector barrels.
While installing a plumbing system requires no specific skill, make sure your Carpentry skill is at least level 6 so that you can build stairs. Alternatively, Carpentry level 7 is ideal for a high-capacity rain collector barrel.
Make Plumbing Systems
As mentioned earlier, you can set up plumbing inside or outside as long as you understand how it works.
Indoor Plumbing System
Assuming you’ve got a sink in your kitchen on a one-story base, you can build stairs inside or outside next to a sink to get to the roof, then build some wooden floors, and make a rain collector barrel right on top of the sink.

Next, go back down, right-click on the sink, and select “Plumb <Sink Name>”.
Outdoor Plumbing System
Crafting stairs solely for the purpose of installing plumbing is quite disorganized and will ruin the beauty of your base.
Moreover, the limited vision cone between the roof and the lower floor makes pinpointing the exact tile for installation quite difficult.
Therefore, we strongly recommend doing plumbing in the exterior area.
First, choose an area where you can build at least a 3×3 plumbing system. You can distinguish it with wooden floors.
Next, craft a wooden crate and place it anywhere in the area you marked earlier. Our suggestion is in the center tile of the 3×3 area. Note that you can also pick up the counter where the sink is previously located.
Then, you need to get inside your base or other residential houses nearby and pick up a sink. Remember that there’s a chance of breaking it.
Afterward, go back to the wooden crate and place the sink on it by selecting the “Place” action at the cabinet button on the top left side of your screen.

Now, you must enclose the area around the sink by right-clicking on the ground and selecting “Carpentry” => “Walls” => “Wooden Wall Frame”.
In this case, using metal wall frames has nothing to do but waste resources. Besides, it’s up to you to upgrade it to wooden/metal walls, or you can let it be with wooden wall frames.
Once finished, right-click on the ground and choose Carpentry again, then select “Stairs” and place the stairs right next to the area where you can easily access the second floor.
Fill the second floor with wooden floors, then pinpoint the exact tile to place the water storage item.

If you build an area larger than 3×3 (like 5×5 or 6×6), you can pinpoint a tile precisely by right-clicking and choosing “Walk To” to mark the spot for the sink. Repeat this for the corresponding spot on the second floor.
Now, right-click on the ground and select “Carpentry” => “Furniture” => “Rain Collector Barrel” and place it in a corresponding tile.
Obviously, you can place other water storage items, such as cooking pots or saucepans. However, be aware of their limited capacity and keep in mind that this setup is intended for long-term use.
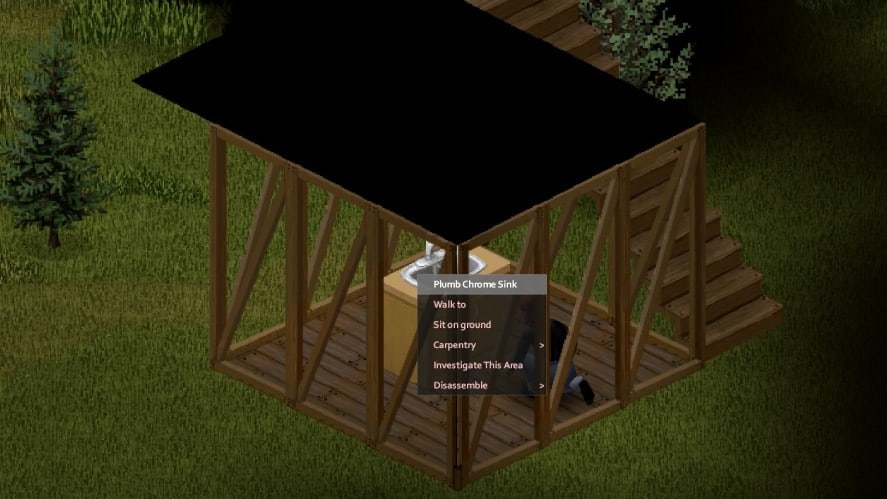
To end the installation, return to the sink and select “Plumb <Sink Name>”. From now on, you will have a complete system to convert tainted water into clean water.
That’s how plumbing works and how to do plumbing in Project Zomboid!
Have any suggestions for this guide? Let us know in the comment section below.