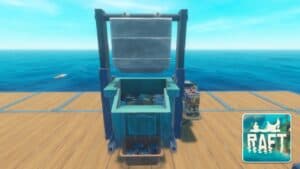
The Receiver is one of the items that you need to craft before you can start the storyline in Raft.
It is, however, not as easy to use the Receiver as it is to use other Navigation items. Besides the high altitude required, you must also use another special structure called the Antenna for it to work.
Recommended Read: How to Build a New Raft in Raft
In this guide, we’ll show you how to use the Receiver in Raft!
To use the Receiver in Raft, place it at a certain distance from the other 3 Antennas, put a Battery in the Receiver’s left slot, and turn it on by pressing “E” while looking at its screen. The Antennas can be placed on the same floor as the Receiver or half a floor above or below it.
Table of Contents
How to Use the Receiver in Raft
Before you can use the Receiver in Raft, you need to place at least 3 Antennas around it.
Here is how to get the necessary items for the Receiver and Antennas and how to set them up!
1. Obtain the Receiver and the Antenna Blueprints
Unlike other essential items, the Receiver and the Antenna recipes are locked until you find their blueprints and research them in the Research Table.
The only way to find their blueprints is by finding barrels. Each barrel that spawns after the 15- and 30-minute mark has a chance to contain one of the two blueprints.
If you frequently collect barrels, you should have both blueprints by the afternoon of day 2. For your information, a day in Raft lasts 20 minutes in real life.
Once you obtain the blueprints, they will automatically be used, and the locked recipes for the Receiver and the Antenna are available for research.
Next, open the Research Table and research the following items to unlock both recipes: 1 Plank, 1 Plastic, 1 Scrap, 1 Circuit Board, 1 Hinge, and 1 Bolt.
Finally, click the “Learn” button next to their recipes to unlock them permanently.
2. Set Up the Receiver
You’ll need 1 Receiver and 3 Antennas for this step.
The Receiver needs to be placed at least 1 pillar high, while the 3 Antennas can either be placed on the same level as the Receiver or placed half a level above or below it.
That’s why it’s crucial to learn how to build a second floor in Raft.
Not only can you use the second floor for the Receiver setup, but you also have more space to work with without building more foundations at sea level.
The fewer foundations on the first floor, the fewer Engines and resources are required for fortifying the foundations.
Besides the altitude, the Antenna must be placed 3 meters (or 2 foundations) away from the Receiver.
Each Antenna must be placed at least 5 meters (or 3.5 foundations) away from each other.

The most efficient way to make this setup is to build a 5×4 area on the second floor, place the Receiver in the center at one end and 2 Atennas to the left and right of it, and place the remaining Antenna at the other end.
The three Antennas form a T-shape, with the Receiver being in the center at the top of the “T”.
It’s worth noting that the distance between Receiver and Antenna is based on the center of the Receiver, not its edges.
Finally, craft a Battery and place it in the Receiver’s left slot. Now you’re ready to use the Receiver!
3. Use the Receiver
To turn the Receiver on, look at its screen and press “E”.
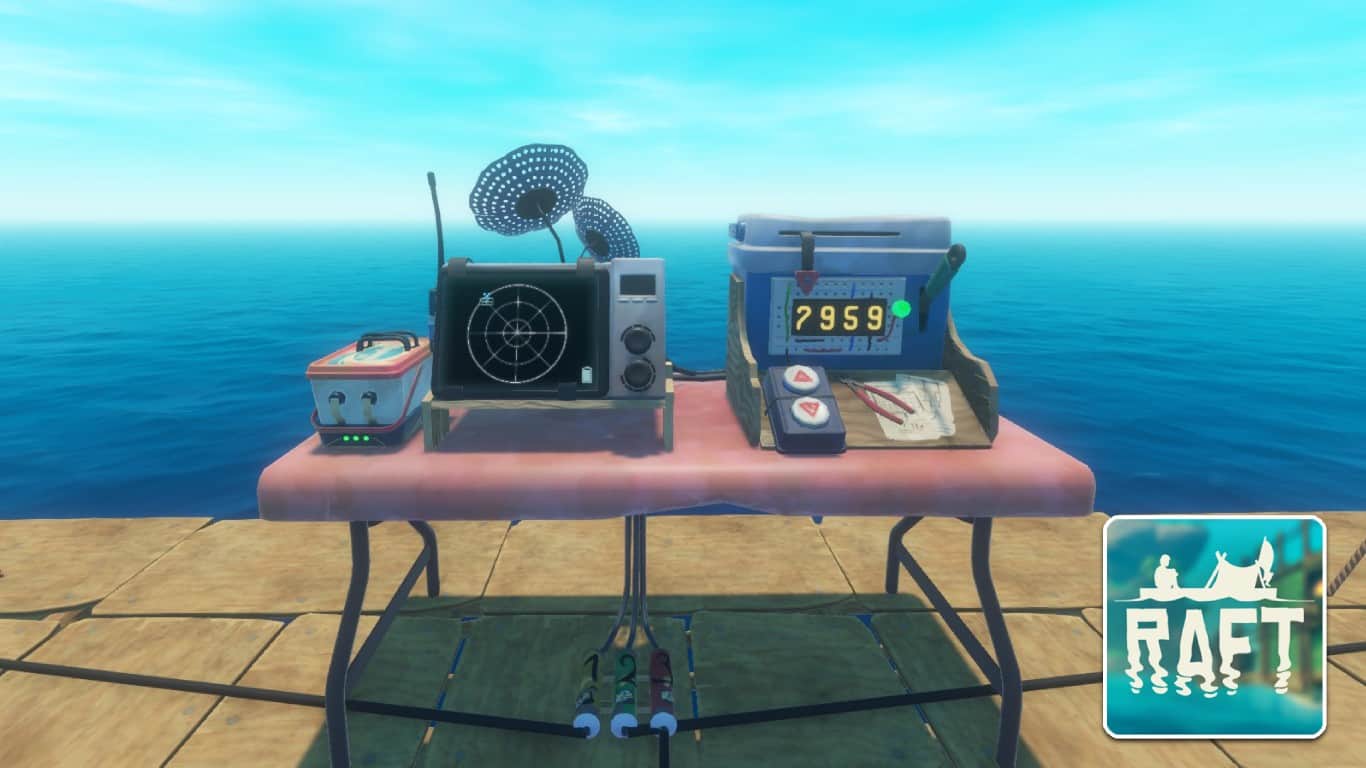
You’ll see a screen displaying some green dots and a blue dot the first time you turn the Receiver on. The green dots are large islands, and the blue dot is the tracked island (or story island).
What is the tracked island, you may ask? See the machine to the right displaying a 4-digit code?

Each story island in Raft has a different coordinate represented by these 4 numbers. By switching them to the correct number, indicated by the green light, you can track the next story island’s location.
If this is the first time you use the Receiver in your current world, the correct coordinates will automatically be inputted.
What you need to do now is to follow the blue dot with 4 triangles around it as it leads you to the first story island in the game – The Radio Tower.
Later on, when you have more codes for other story islands, you can change these 4 numbers by turning the lever and pressing the up and down buttons.
Doing so reveals a new blue dot with 4 triangles around it, indicating you’re tracking a new story island.
As you can see, the main purpose of the Receiver is to track story islands. However, you can also use it to visit large islands (green dots) to gather rare resources.
Remember that the 4-digit codes are random for each run, so you must progress through the storyline to get the codes.
The dots displayed on the Receiver’s screen are based on the direction of the Receiver, not the raft or the wind direction.
So, if you see a dot at the top of the Receiver, it means that the island is directly in front of you and the Receiver.
That’s how to use the Receiver in Raft!
Have any suggestions for this guide? Let us know in the comment section below.