To lengthen your survival in Project Zomboid, relying solely on weapons might not be enough. A small yet versatile item like the Suture Needle can be a game-changer for your survival.
So, what is its usage, and how do you use Suture Needles in Project Zomboid?
Recommended Read: How to Make Tea in Project Zomboid
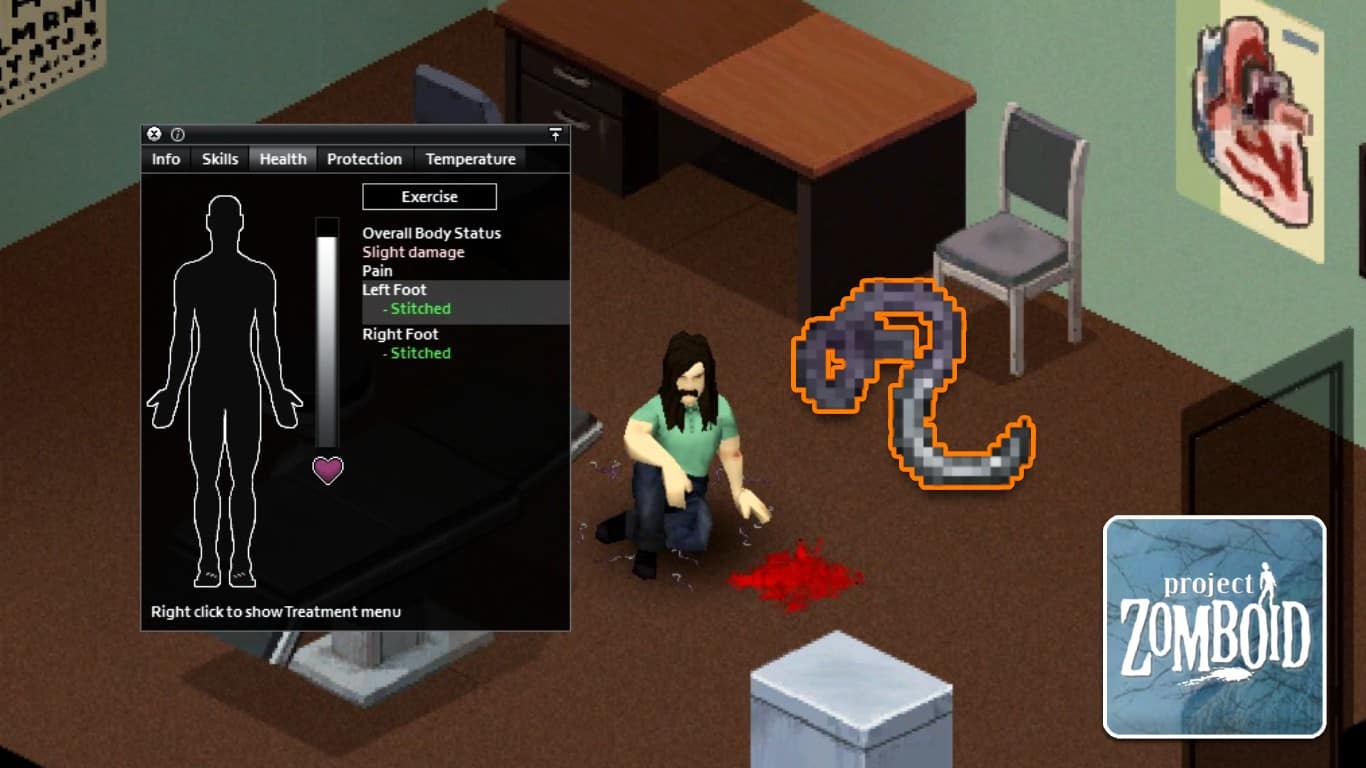
You can use the Suture Needle to stitch open wounds in Project Zomboid. To use it, you can either press “H” or click on the heart icon on the left side to open the Health window, then right-click on the open wound and select “Stitch” => “Suture Needle”.
Table of Contents
How to Use Suture Needle in Project Zomboid
Although a Suture Needle can be found in medicine cabinets and first aid kits, it is considered a rare item in Project Zomboid, based on the experience of many survivors.
However, it comes with a good trade-off, as it offers a benefit that may surprise you.
In Project Zomboid, the Suture Needle can be used to stitch your open wound and prevent it from bleeding again.
Assuming you have a deep wound and already have the Suture Needle in your inventory, you can press “H” or click on the heart icon on the left side of your screen to open the Health window.
Next, right-click on the wound and select “Stitch” => “Suture Needle” to cover it.
Using the Suture Needle to treat the open wound is pain-free and requires no Thread, unlike the Needle.
But keep in mind that the Suture Needle is consumed after each stitch and can only be applied to deep wounds.
That’s how to use the Suture Needle in Project Zomboid.
Have any suggestions for this guide? Let us know in the comment section below.